How do you edit your Shopify store menu?
The menu helps visitors find your products in one click. Shopify creates two to start: the main menu, at the top, and the footer menu.
The essentials in 30 seconds
- Open « Menus »
- Add a link
- Move items or create a dropdown
- Rename or delete
- Check on your phone
Avoid: A main menu with ten or more links: visitors no longer know where to click.
See the details with screenshots ↓Step by step
Screenshots show the interface used in the original guide (Shopify in French, Leadpages in English). In your account, buttons appear in your language.
- 1
Open « Menus »
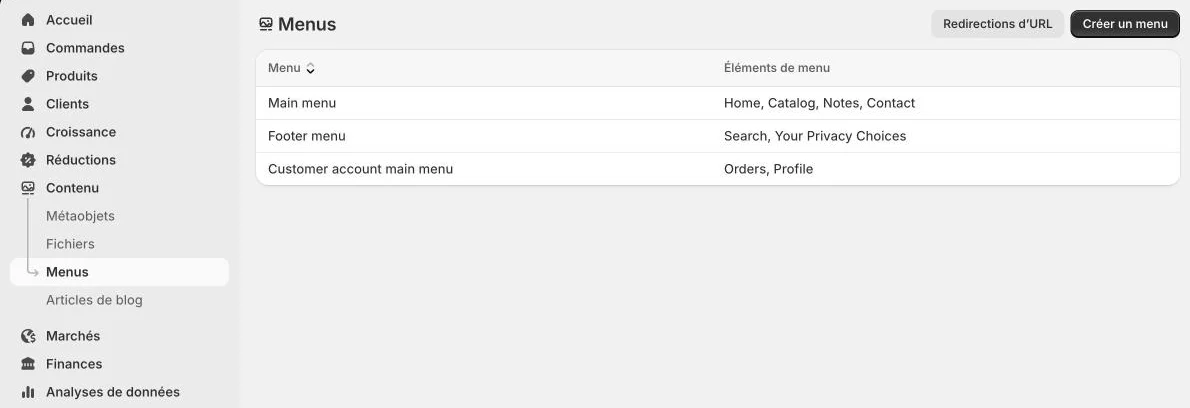
In the admin, click « Content », then « Menus ». Click the menu to edit, for example the main menu.
- 2
Add a link
Click « Add menu item ». Type the name shown, then choose the destination: a collection, a product, a page or a policy. Click « Save ».
- 3
Move items or create a dropdown
Drag an item to change the order. For a dropdown, drag an item under another one and slightly to the right: it becomes a submenu.
- 4
Rename or delete
Click an item to change its name or destination. The trash icon removes it from the menu, without deleting the page itself.
- 5
Check on your phone
Save, then open the store on your phone. The main menu often shows behind an icon there: keep names short and entries few.
Try it yourself
Shopify starts free, then has a discounted launch offer. You can set everything up before paying.
Try Shopify ↗Affiliate link: it does not change the price for you.
Common mistakes
- A main menu with ten or more links: visitors no longer know where to click.
- Practical pages (shipping, returns) in the top menu instead of the footer.
Official sources
Get the next guides
New Leadpages, HTML Pub and Shopify guides by email, every two weeks. No spam, unsubscribe in one click.