How to add a product on Shopify?
A good product page sells. Shopify guides you field by field, and saved changes show up in your store right away.
The essentials in 30 seconds
- Open « Add product »
- Write the title and description
- Add the photos
- Set the price and inventory
- Set shipping and variants
- Choose the status and save
Avoid: Leaving the weight at 0: shipping rates will be wrong.
See the details with screenshots ↓Step by step
Screenshots show the interface used in the original guide (Shopify in French, Leadpages in English). In your account, buttons appear in your language.
- 1
Open « Add product »
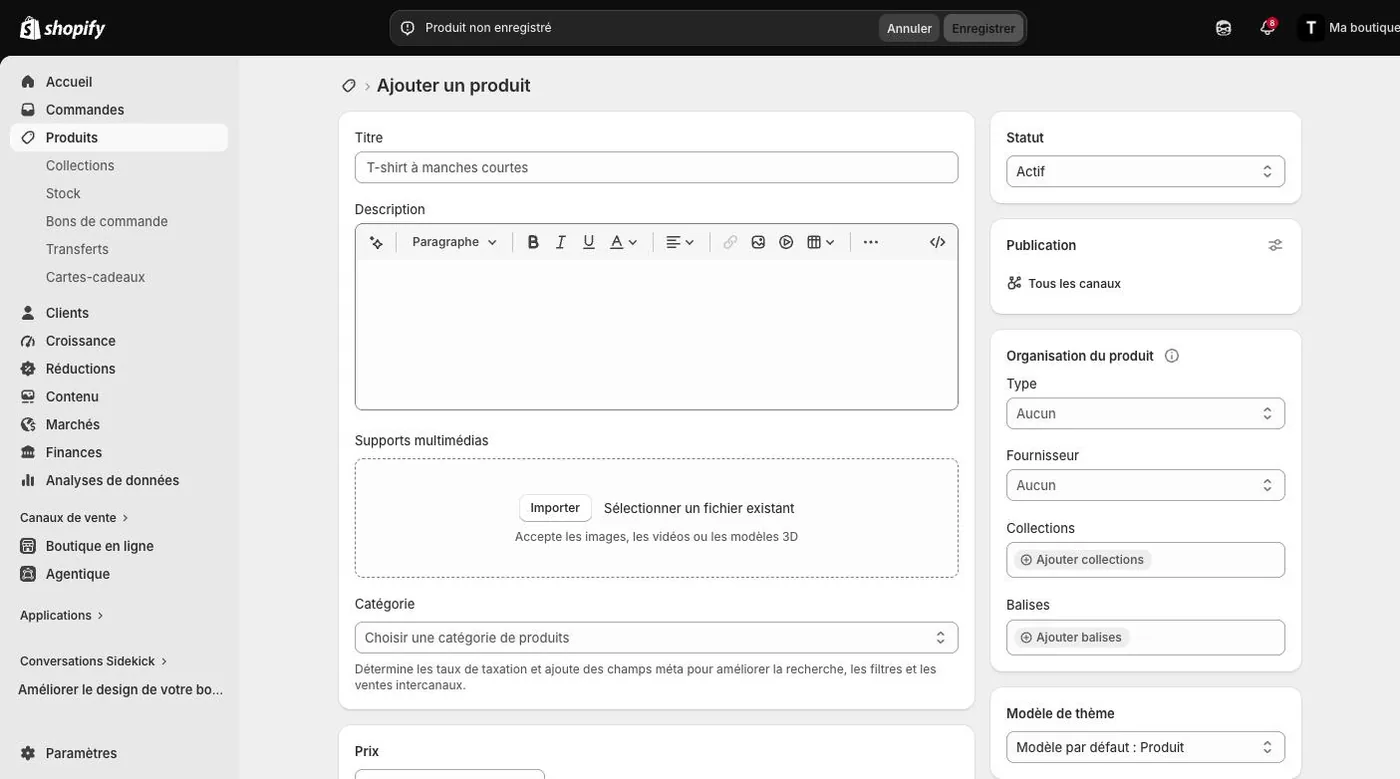
In the left menu, click « Products », then « Add product ».
- 2
Write the title and description
A clear title, then a description that answers the buyer's questions: material, size, use, delivery time.
- 3
Add the photos
In « Media », click « Upload new ». Images, videos and 3D models are accepted.
- 4
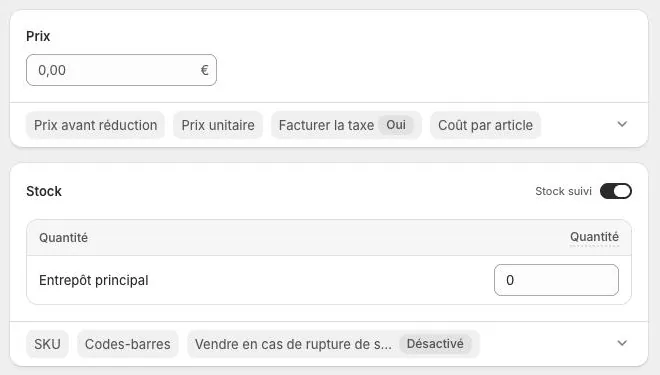
Set the price and inventory
Enter the price and, if you want, a « Compare-at price ». In « Inventory », enter the quantity available.
- 5
Set shipping and variants
For a physical product, enter the weight. Add variants (size, color) if needed. For a digital file, turn off « Physical product ».
- 6
Choose the status and save
The « Active » status makes the product visible. Click « Save ».
Try it yourself
Shopify starts free, then has a discounted launch offer. You can set everything up before paying.
Try Shopify ↗Affiliate link: it does not change the price for you.
Common mistakes
- Leaving the weight at 0: shipping rates will be wrong.
- Photos of different sizes: the store looks less professional.
Official sources
Get the next guides
New Leadpages, HTML Pub and Shopify guides by email, every two weeks. No spam, unsubscribe in one click.