How do you create a blog with HTML Pub?
A blog brings visitors from Google and social media. With HTML Pub, it takes a minute to set up, and posts go live as soon as you publish them.
The essentials in 30 seconds
- Create the blog
- Explore the blog dashboard
- Write a post
- Fill in the post settings
- Publish
- Attach it to your site
Avoid: Publishing posts without a cover image: they get fewer clicks on social media.
See the details with screenshots ↓Step by step
Screenshots show the interface used in the original guide (Shopify in French, Leadpages in English). In your account, buttons appear in your language.
- 1
Create the blog
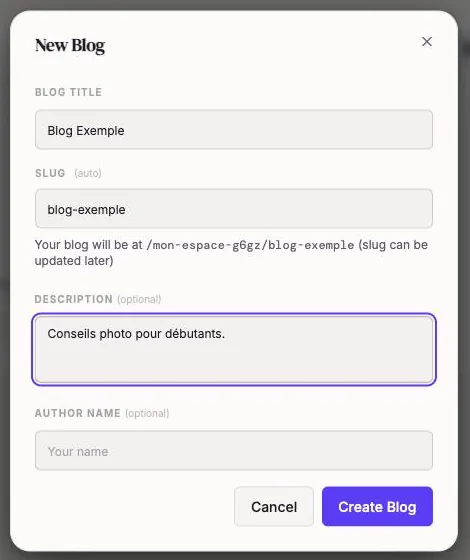
In the left menu, open « Blog » and click « New Blog ». Give it a title; the address (slug) fills in on its own. The description and author name are optional. Click « Create Blog ».
- 2
Explore the blog dashboard
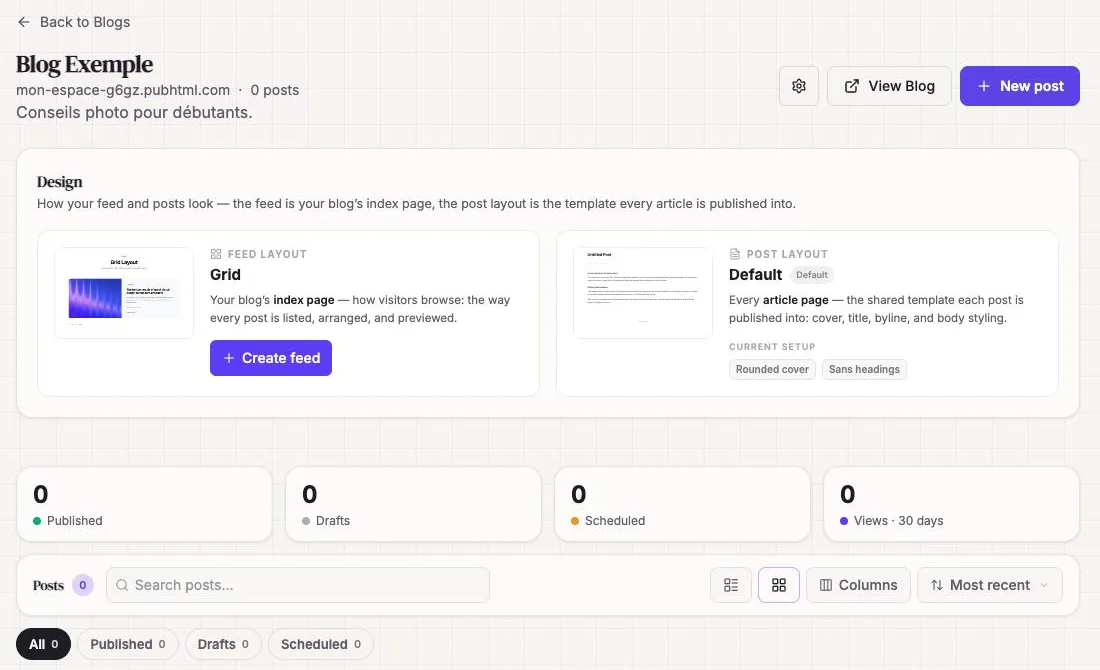
The blog page shows the design of the blog homepage (« Feed layout ») and of posts (« Post layout »), then your published, draft and scheduled posts.
- 3
Write a post
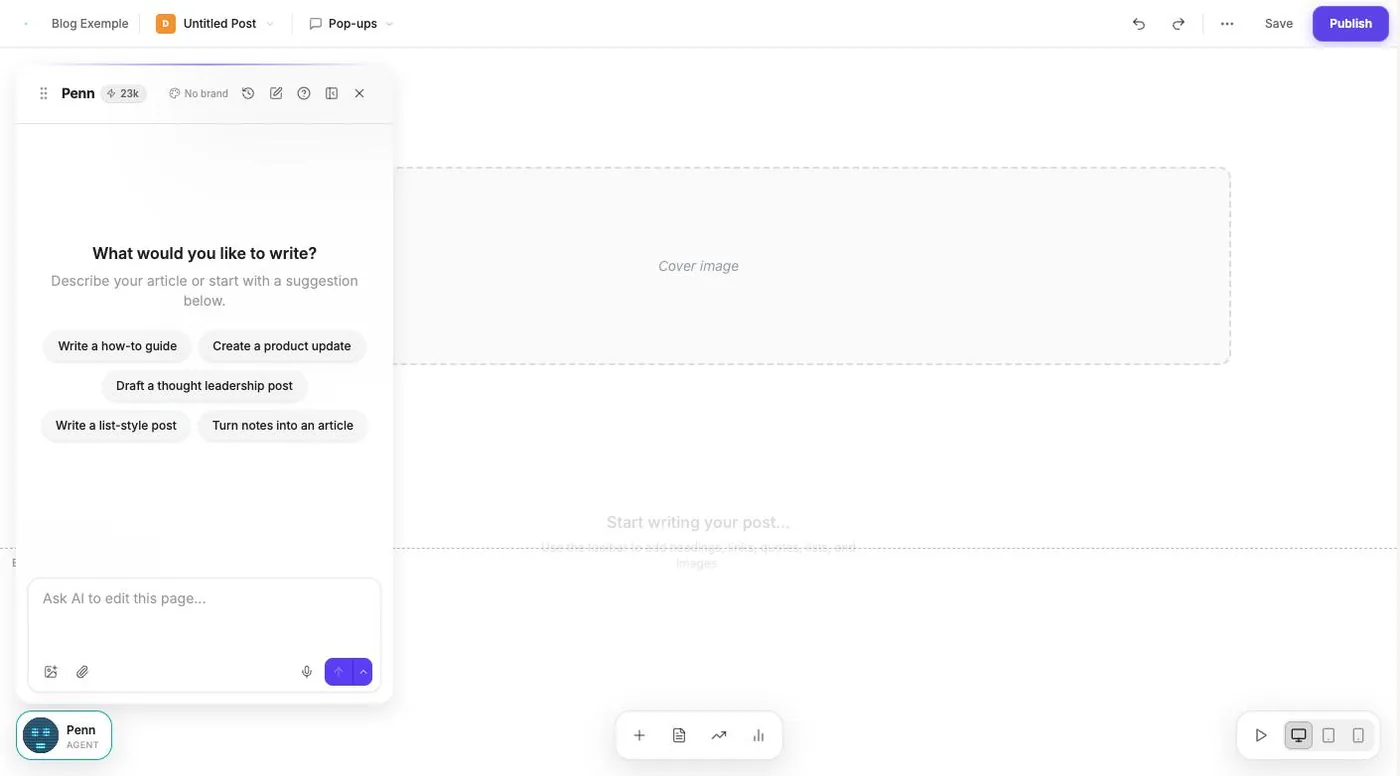
Click « New post ». The editor opens with Penn, the writing assistant: pick a suggestion (« Write a how-to guide »…) or write it yourself.
- 4
Fill in the post settings
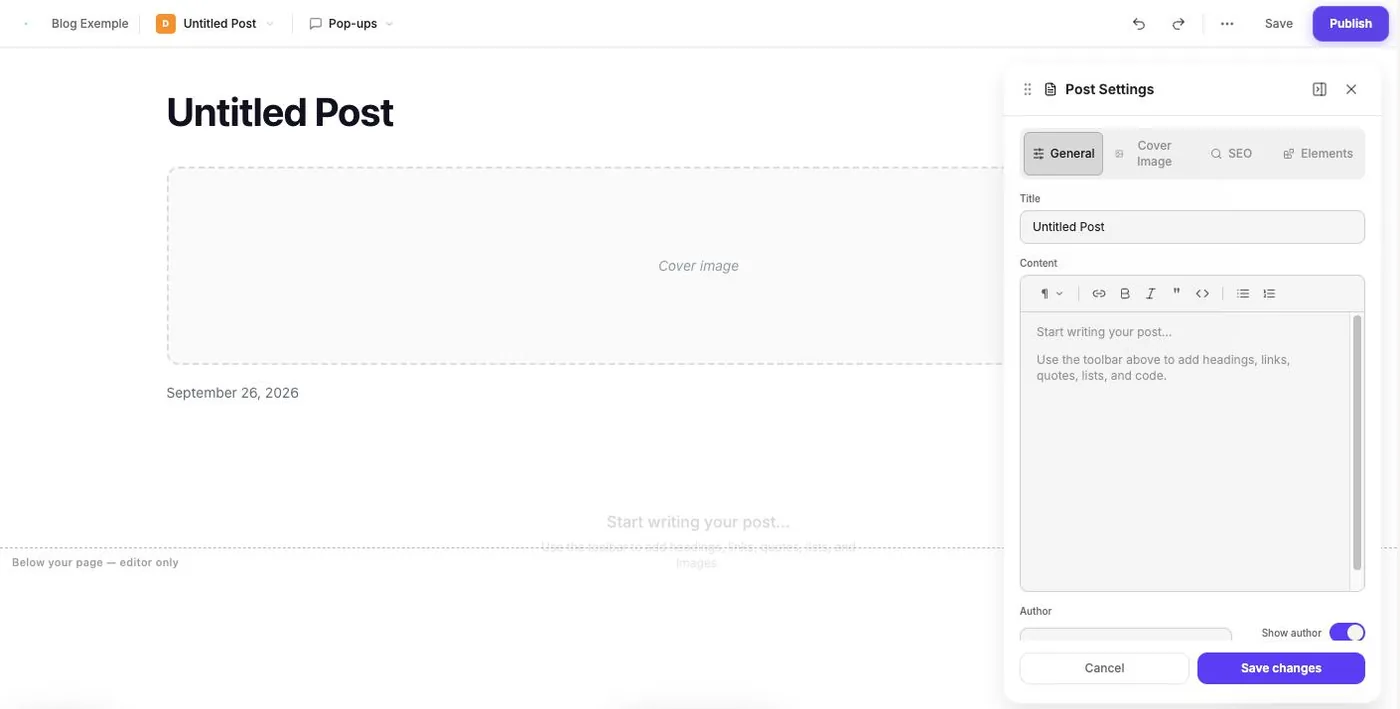
The document icon at the bottom opens « Post Settings »: title, content, author, cover image and SEO. Click « Save changes ».
- 5
Publish
Click « Publish » at the top right. The post is live immediately.
- 6
Attach it to your site
If you have an HTML Pub site, you can show the blog at the /blog address of your domain.
Try it yourself
Every HTML Pub and Leadpages plan has a 7-day free trial, with all features.
Try Leadpages for 7 days ↗Affiliate link: it does not change the price for you.
Common mistakes
- Publishing posts without a cover image: they get fewer clicks on social media.
- Choosing a plan without a blog: check that yours includes at least one.
Official sources
Get the next guides
New Leadpages, HTML Pub and Shopify guides by email, every two weeks. No spam, unsubscribe in one click.